
If you are looking to use your land to generate some income, it makes sense to test the fertility and acidity of your soil. This means taking samples for soil testing at an agricultural laboratory.
The test will indicate the ratio of nitrogen, phosphorous and potassium, as well as the other necessary minerals and trace elements. It will also give the pH of your soil, which refers to the acidity or alkalinity.
Once you know what you have in your soil, you can plan to plant crops which will do well in that soil or you can apply fertiliser which will correct the balance that you need for the crops or vegetables that you wish to plant.
Winter is a popular time for testing, as growers will be preparing for their spring planting.
Find out beforehand from the laboratory that you are using about their instructions for taking samples, as there are different ways of taking samples for soil testing.
An important consideration is the depth at which you take the soil. According to Dr Garry Paterson, Research Team Manager: Soil Science at the Agricultural Research Council (ARC), the determining factor should be the actual depth of the topsoil horizon. “If the horizon is 150mm thick, then that is what should be sampled. If it is 300mm, or even deeper, then one should collect a composite sample of the whole depth.”
 The topsoil will be your first sample. It is important to sample the topsoil because that is where most root feeding takes place and where the fertiliser is integrated into the soil. How much deeper you go after that will also depend on what you want to grow, as different plants have root systems which go down to different depths. The subsoil can be sampled at 300-600mm or as deep as 1000mm.
Paterson explains: “If the subsoil horizon is quite thick (e g from 300 to 1200 mm), then one can collect a sample from the upper subsoil and the lower subsoil, but always look at the soils themselves, not fixed depths.”
The deeper samples will also help to test the drainage in the soil.
It is recommended that you take six samples from a hectare of land. Follow a zigzag pattern across the field, or follow an S or W to draw your samples.
You can use a spade when taking samples for soil testing. Dig a square hole to the deepest depth that you will be sampling. Make the sides clean and smooth. Note the depth of the topsoil, then scrape upwards from that point up to the surface. Pour the soil into a container or bucket and set aside. Measure to the deeper level and once more scrape the side upwards up to the where the topsoil horizon ends, to give the subsoil sample. Pour the soil into a different container. Do the same in another three to five places in the field, keeping the topsoil separate from the subsoil. Once you have taken all the samples mix them well in their individual buckets, so all the topsoil is well mixed and all the subsoil is mixed in its own bucket.
Each of the final sample mixes should amount to a mass of 0,5-1,0kg. Place each in a separate, clean plastic bag and label it. Take care not to use a bag that might have contained any fertiliser, salt or other chemicals.
You can also use a Beater soil sampler, which is a tool designed by Dr Beater at the South African Sugar Association. It allows for relatively rapid sampling of fields by taking a numbers of cores to a fixed depth, as it can be fitted with different probes. Although the sampler does not work well in very wet or very hard soil, it is easy to operate in most soils types over a wide range of soil moisture and clay contents. The whole kit is available for about R950.
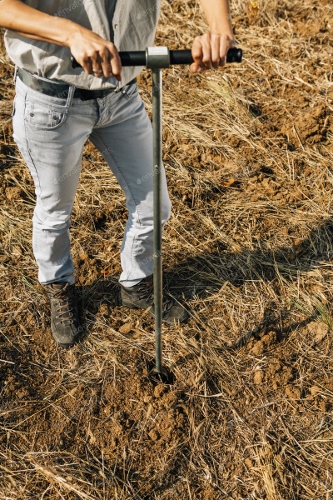
There are also augers or soil probes available for soil testing, priced at round about R1300.
The ARC offers soil testing services at their premises in Pretoria, where they will also make fertilisation recommendations. The ARC has smaller labs at centres like Rustenburg, Nelspruit and Stellenbosch, but they do not have the full range of equipment and will only offer a more basic service. The provincial department of agriculture in KwaZulu-Natal and Western Cape also offer testing facilities. Furthermore, there are a number of commercial companies that will do the testing for smallholders in bigger centres.
Each laboratory will have its own form and requirements. Some provide containers for the samples to be placed in.
This is part three in a five-part series on Soil Health. For more, click here.
Have soil to test i don’t know what to do