Need to build a quick afdak/shelter/shed/cover to protect vehicles, tractors or implements? Here’s the quickest and cheapest way to construct one that is sturdy and long-lasting. When finished it will measure approximately 12m wide and 6m deep, and will give you under-cover parking for four vehicles.
Materials
6 CCA treated gum poles of 100-125mm dia, 6m long
13 CCA treated gum poles of 75-100mm dia, 6m long
19 lengths of corrugated iron for the roof, each 6m long
Some lengths of 12mm dia threaded rod, with associated nuts and wide-flange washers.
A double-length 12 or 13mm wood drill bit.
A box or two of roofing nails and washers
A small quantity of concrete for the footings of the uprights. The concrete mixture can be one bag of cement to two builder’s wheelbarrows each of sand and stone.
Clear and level a space measuring at least 13m wide by 7m deep.
Method
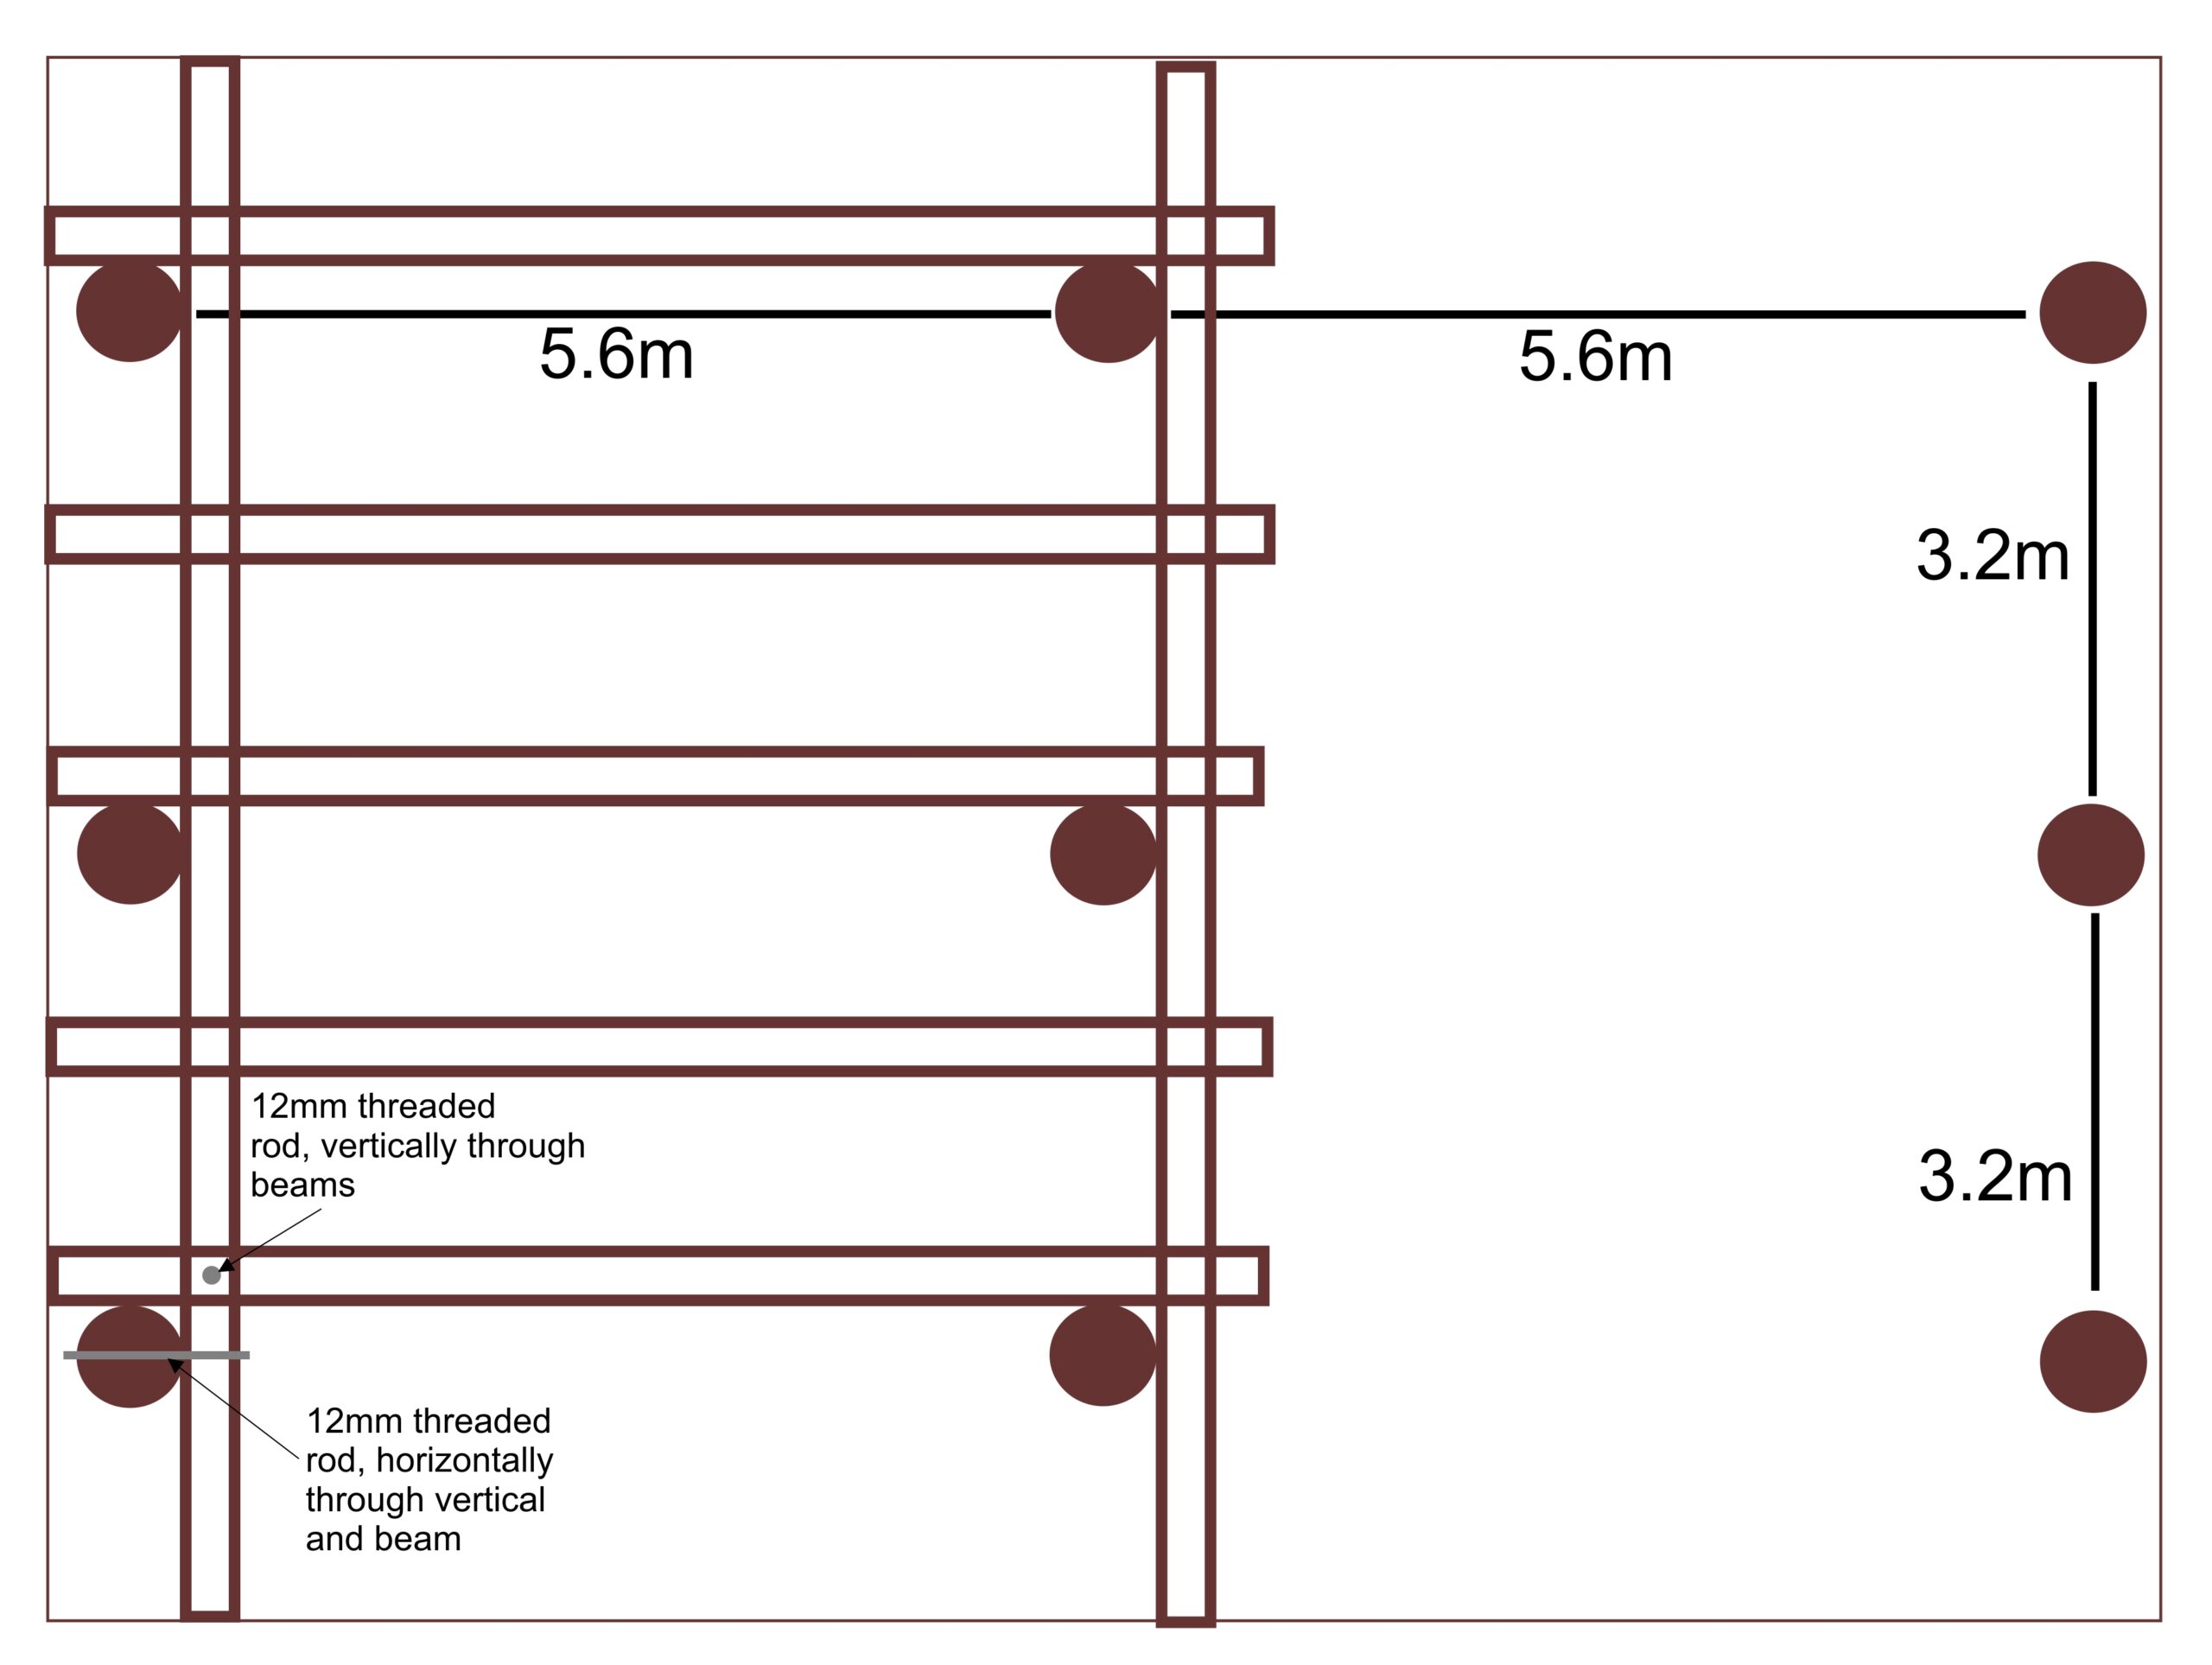
Plant your vertical uprights in concrete footings, with the thicker end down, set at least 500mm deep. Do this in two rows of three. The rows should be 3.2m apart, and the spacing between the poles in the rows about 5.6m.

The two rows of poles should be positioned in the middle of the cleared space.
Allow the concrete footings to set and cure fully.
Using a spirit level on a string, ensure the tops of the poles are level, with the rear row a bit lower than the front to allow rainwater run-off.
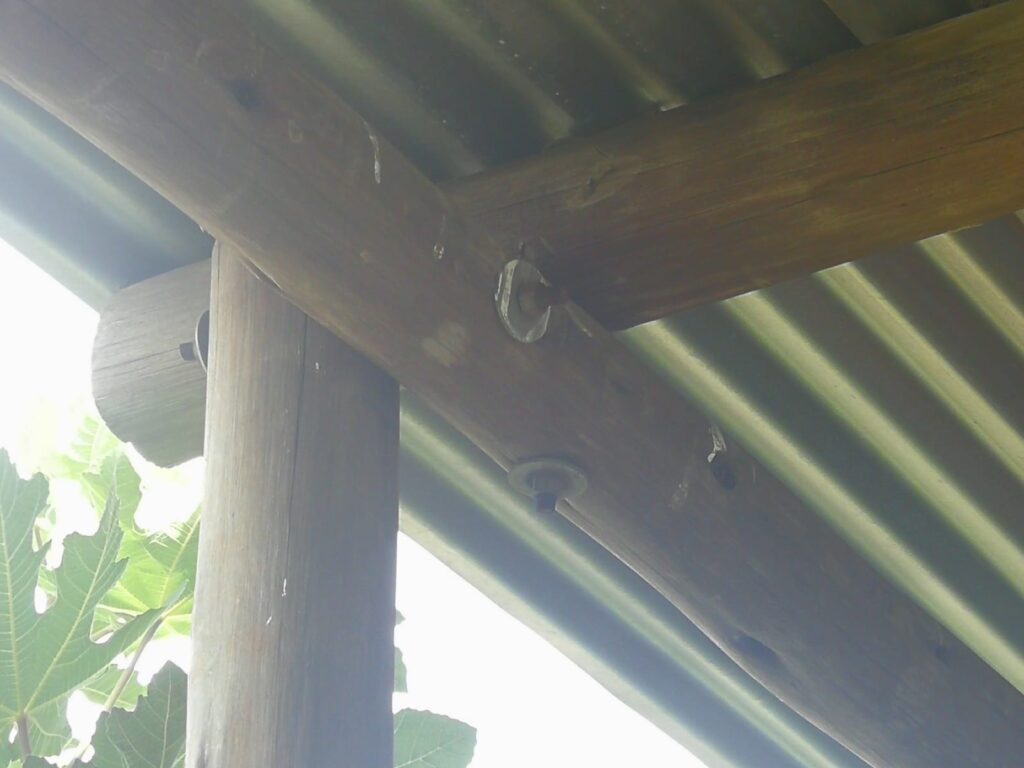
Fasten three of the thinner poles, one each, between each of the two sets of verticals, so that they over-hang the verticals by about 800mm on both ends. Don’t fasten them flush with the tops of the verticals, but set them down about 100mm. Drill a hole horizontally through both the vertical and the beam pole. Slip through a length of threaded rod, and fasten securely with a washer on both sides, and a tight nut.


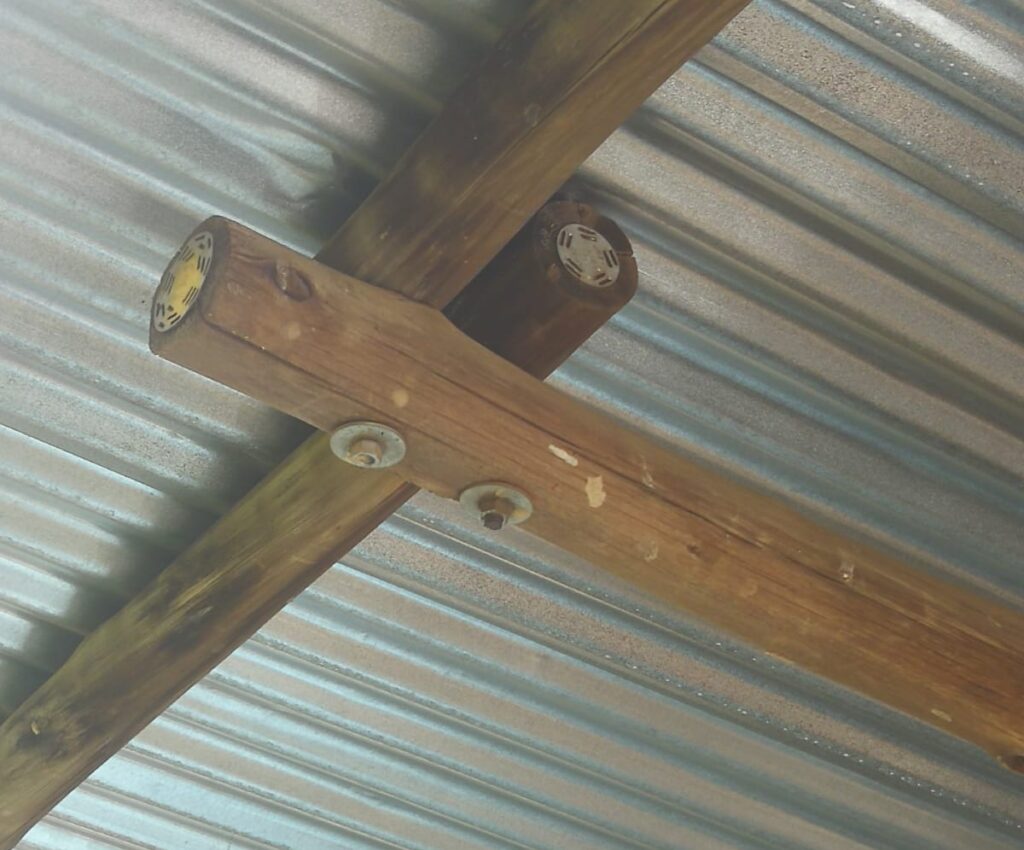
You can speed up the process by pre-cutting the threaded rod into lengths of between 220 and 250mm, grinding off any burrs on either end. And, if you wish, putting on a washer and nut on one end before pushing the rod through the holes in the poles.With the three beams in place, position the remaining poles, five to each section, each equidistant from each other, on top of the beams. Now drill vertical holes through both the beam and the poles and fasten with threaded rod, washers and nuts.
When fitting the roof sheets take care to get the first sheet positioned accurately on the beams, because any skewness will become exaggerated as more and more are fitted.
Using 19 sheets will give you an overlap between each sheet of three corrugations ~ enough to ensure a good seal against rainwater.
Don’t skimp on the roofing nails. The more you add the less chance there is of the roof blowing off in a wind. As a guide, you should position a nail every third ridge at least. And nail on a ridge, not in the channel, to minimise leaks.

If you want, throw a concrete slab under the covered area, using a high-strength mix of one bag of cement to one builder’s wheelbarrow of sand and one of stone. Preferably throw the slab in two parts, over two or more days, each part covering half of the total area. Leave an expansion joint between the two parts. To make an expansion joint, position two layers of corrugated cardboard down the side of one completed half-slab before throwing the other half.
Or, lay paving or cobblestone ~ it’s your choice.
After the first season (by which all traces of oil should have evaporated) clean the roof, prime with galvanised iron primer and paint the roof, preferably with a light colour roof paint.
This is a part of a series on buildings and infrastructure on smallholdings and small farms. To read the series, click here.

